Veg

Aloo Gobi
Veg

My Real, No-BS Take on Aloo Gobi – The Way We Actually Make It at Home in Kolkata

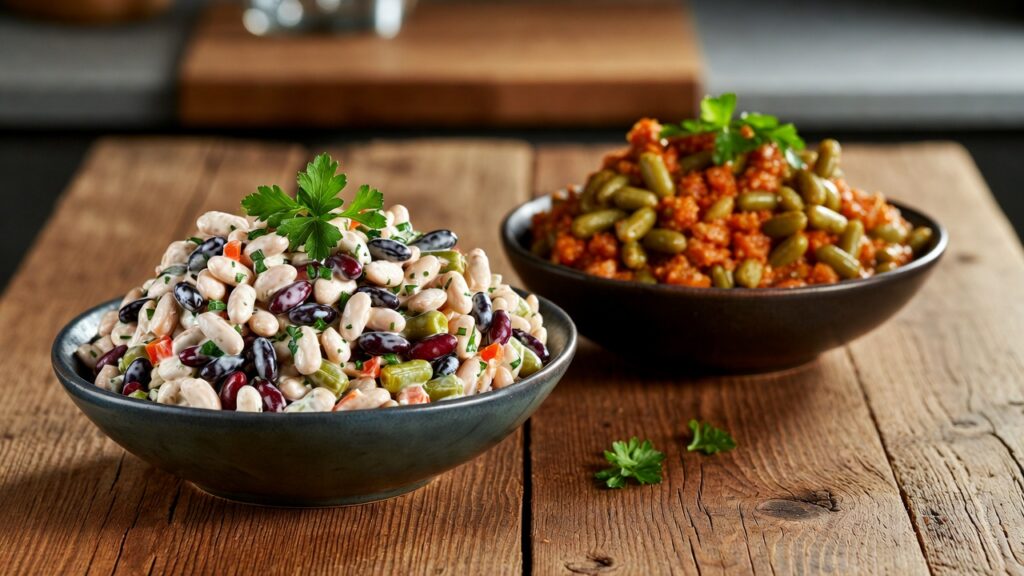
Aloo Gobi: Hey, it’s Testy here. If you read that last version I put out about Aloo Gobi, you’ll know it felt way too perfect – like some robot wrote it while wearing a suit. Sorry about that. I asked for it to feel human, so here we go again. This time, no fancy headings everywhere, no bullet-point lists pretending to be organized, just me typing like I’m chatting with you over a cup of cutting chai on a February evening in Kolkata (it’s actually pretty nice weather right now, not too hot yet). Aloo Gobi is that dish for me. Not the star of any wedding menu, not something you’d Instagram for likes, but the one that shows up 2-3 times a month when you just want dal-roti-sabzi and nothing complicated. In our house, it’s Punjabi-style dry sabzi – the kind where the edges of the potato get a little golden and crispy, the cauliflower stays firm enough to bite, and the whole thing smells like jeera and haldi the second you open the kadhai lid. I learned this from watching my mom and then messing it up myself a dozen times in hostel days. First attempt? Way too much water, turned into weird soup. Second? Burnt bottom because I forgot to stir. Third time lucky-ish. Now I don’t even measure most things – it’s all andaza (guesswork), which is honestly how most Indian home cooking works. Credit by: AI Generated Img What You Actually Need (Rough Amounts for 3-4 People) That’s it. Nothing exotic. Total cost probably under ₹100 if you buy from the local market here. Credit by: AI Generated Img How I Make It (Step-by-Step, But Casual) Get your kadhai or deep pan on medium flame. Pour the oil and wait till it’s hot – like properly shimmering. Crackle the cumin seeds (and hing if using). Then dump the onions. Fry them till they’re golden – not dark brown, not raw. This takes patience, maybe 6-8 minutes. Stir now and then. Add ginger-garlic + chilies. Stir for a minute till the raw smell vanishes. Now tomatoes + salt + turmeric + coriander powder + red chili. Bhuno this properly – cook till the tomatoes break down, oil starts separating from the sides. This step makes or breaks the taste. Rush it and the sabzi will taste flat. Toss in the potato pieces first. Mix so they’re coated. Cover, lower flame, let them soften a bit (8-10 mins). Stir once halfway. Then add the cauliflower. Give everything a good mix. No water unless it’s sticking like crazy – the moisture from the veggies is enough. Cover again, low flame. Stir every 5 minutes or so. Total another 12-18 minutes depending on how big your pieces are. When the gobi is tender (poke with spoon – should give way but not mush), open the lid, crank the flame a bit higher for 2-3 minutes to dry any extra moisture and get those nice roasted bits. Finish with garam masala, maybe crushed kasuri methi, chopped coriander. One quick stir on high flame. Taste – adjust salt or chili if needed. Done. Smells insane, tastes like home. Credit by: AI Generated Img Little Twists I Do Sometimes(Aloo Gobi) Credit by: AI Generated Img Why This Beats Restaurant Versions Restaurant Aloo Gobi is often swimming in oil or gravy, over-spiced to hide cheap veggies. Home version is lighter, lets the cauliflower and potato shine, and you control the heat level. Plus it’s healthy-ish – fiber from gobi, potassium from aloo, anti-inflammatory spices. One big plate with roti and dal keeps you full for hours without feeling heavy. Common mistakes I’ve made (learn from me): Serve it hot with soft phulkas, a bowl of yellow dal, some achar, and maybe raita if the chili is strong. In our house, it’s always family-style in steel plates, everyone fighting for the crispy potato bits at the bottom. Credit by: AI Generated Img Read More Recipes: Kadhai Paneer – The One Paneer Dish I Can Eat Every Single Week Without Getting Bored Try making it this weekend. Mess it up? Laugh it off and try again. That’s how we all learned. What’s your comfort sabzi story? Or how do you make Aloo Gobi different? Tell me in the comments – I actually read them. Stay cozy, eat well. 😊

Dense Bean Salads
Veg

Dense Bean Salads: My New Go-To Lunch That Actually Sticks With Me

Dense Bean Salads: Look, I never thought I’d be the guy writing about salads. Salads were always that thing you ordered when you felt guilty, then regretted five minutes later because it wasn’t enough food. But last year I kept seeing these “dense bean salads” all over my feed—mostly TikTok clips of people dumping cans of beans into giant bowls with a ton of chopped veggies and some killer dressing. The creator who kicked it off big time is Violet Witchel (people call her the dense bean salad girl). Her original ones looked simple but massive, colorful, and way more appealing than any lettuce-heavy thing I’d tried(Dense Bean Salads). I finally caved and made one on a Sunday when I was tired of spending money on takeout lunches that left me crashing by 3 p.m. Used two cans of chickpeas, one of white beans, cucumber, bell peppers, red onion, olives, a bit of feta, and a quick olive oil-lemon dressing. Threw it together in like 15 minutes. Ate it for four days straight. Didn’t get tired of it. Didn’t get hungry an hour later. That was the game-changer. Credit by: AI Generated Img What Makes a Salad “Dense” Anyway? It’s not fancy. “Dense” just means it’s packed—mostly with beans instead of fluffy greens—so it’s got real substance. Protein from the beans (usually 15–25g per serving depending on how you build it), fiber that keeps your gut happy, and veggies for crunch and vitamins. No wilting, no sad soggy leaves. It sits in the fridge and actually improves after a day or two because the flavors meld. I like that it’s forgiving. Forgot to buy fresh herbs? Fine. Only have black beans? Works. Want to toss in leftover chicken or skip the cheese for vegan? Go for it. It’s the opposite of those rigid recipes that make you run to three stores. Credit by: AI Generated Img The Health Side (Without Sounding Like a Lecturer) I’m no diet expert, but I can tell you what I’ve noticed. Before, my lunches were sandwiches or wraps that left me bloated or crashing. These bean salads keep my energy steady. The fiber is no joke—beans have a ton, and it helps with digestion in a way that actually feels good, not forced. Protein keeps me full longer, so I’m not raiding snacks mid-afternoon. Plus all the veggies sneak in extra nutrients without tasting like “health food.” One batch usually gives me 5–6 solid servings. Calorie-wise it’s around 400–500 per bowl, but because it’s so filling, I don’t feel deprived. I dropped a few pounds without trying hard, mostly because I stopped eating junk when I had this ready. My energy’s better too—no more 4 p.m. slump. Credit by: AI Generated Img My Everyday Mediterranean Version (The One I Make Most) This is basically a riff on Violet’s classic. It’s what I default to. Stuff you’ll need (for about 5–6 servings): Credit by: AI Generated Img Dressing (shake in a jar): Dump everything in a big bowl, pour the dressing over, mix well. Let it sit in the fridge at least an hour—overnight is even better. I eat it cold, straight from the container at my desk. Credit by: AI Generated Img When I Want Something Spicier: Southwest Style(Dense Bean Salads) Some weeks I switch it up. This one’s got more kick. Dressing: lime juice, olive oil, cumin, chili powder, pinch of honey or sugar, salt. Tastes like a bean version of street corn salad. I sometimes scoop it into tortillas for variety. Credit by: AI Generated Img Other Ones I’ve Messed With Credit by: AI Generated Img Tips I’ve Learned the Hard Way Credit by: AI Generated Img Read More recipes: Cucumber Salads — The Thing I Make When I Can’t Be Bothered to Cook Why This Stuck With Me Honestly, it’s practical. Cheap (beans are like a dollar a can), quick to throw together, lasts all week, and doesn’t feel like I’m forcing “healthy” eating. It’s just tasty food that happens to be good for you. I’ve taken it to work, picnics, even family stuff—people who swore they hated beans kept asking for seconds. If you’re sick of boring lunches or want something that fills you up without weighing you down, give it a try. Start basic, then tweak it to whatever you like. Once you nail your own version, you’ll probably keep going back to it like I do. What’s your spin on it? Hit me with your combos in the comments—I steal ideas all the time.

Cucumber Salads
Veg

Cucumber Salads — The Thing I Make When I Can’t Be Bothered to Cook

Cucumber Salads: I’ve probably made cucumber salad more times than I’ve made proper dinner in the last two years. Not because I’m some health freak, but because it’s stupidly easy, it’s cold, it’s crunchy, and it doesn’t make the kitchen hotter than it already is. Most of the time it starts the same way: I open the fridge, see one or two slightly sad cucumbers staring at me, and think “okay, you’re getting eaten today or you’re going in the bin tomorrow.” Then I chop them up and suddenly I have something that actually tastes good. Credit by: AI Generated Img The version I make 80% of the time (the lazy kachumber) I don’t even peel them unless the skin looks dodgy. Just wash, chop into small-ish pieces (not grated — I like the bite), throw everything in a steel bowl, mix with my hand so I can feel if it needs more lemon or salt. Then I let it sit 5–10 minutes while I do something else. It gets juicy and cold and perfect. I eat this with whatever — dal bhaat, roti sabzi, leftover chicken, or just by itself while scrolling. It’s the salad equivalent of “I’m not really cooking but I’m also not eating chips for lunch.” Credit by: AI Generated Img The smashed one I got addicted to last year I saw people smashing cucumbers on Instagram and thought it looked dumb. Then I tried it and now I do it every couple of weeks. Take one long cucumber, whack it a few times with the side of a big knife till it splits and cracks. Chop into chunky pieces. Then mix: Toss it all together. Eat immediately or stick it in the fridge for 15 minutes. It’s salty, garlicky, spicy, crunchy — stupidly satisfying. I’ve eaten a whole cucumber like this and felt zero guilt. Credit by: AI Generated Img The curd one (basically raita but lazier) When I want something creamy but don’t want to make actual raita with roasting spices and all that. Grate the cucumber or slice very thin, squeeze the water out hard with your hands (this step matters), then mix into beaten curd with everything else. Taste it. Usually needs more salt than you think. Chill it for half an hour if you can wait. Goes with paratha, khichdi, pulao, or just a spoon straight from the bowl while watching reels. Credit by: AI Generated Img The peanut + coconut one I only make when I’m feeling fancy(Cucumber Salads) This one feels like something you’d get at a small dhaba in Bengal or Odisha. Pour the tadka over everything, mix, squeeze lemon. Done in under 5 minutes. Crunchy, nutty, fresh — completely different vibe from the other versions. Credit by: AI Generated Img Stuff I’ve learned after making it wrong a hundred times(Cucumber Salads) Credit by: AI Generated Img Read More Recipes: Baingan Bharta – The One Dish That Makes Eggplant Actually Taste Good What I actually eat it with(Cucumber Salads) Half the time I don’t even put it on a plate. I stand at the counter and eat from the mixing bowl with a spoon. That’s it. Nothing revolutionary. Just a thing that’s cold, cheap, fast, and makes me feel like I ate something decent instead of surviving on chai and biscuits. What’s your usual way to eat cucumber? Plain with salt? Or do you have some weird combo I should try? Let me know — I’m always stealing ideas. 😄

Baingan Bharta
Veg

Baingan Bharta – The One Dish That Makes Eggplant Actually Taste Good

Baingan Bharta: Okay, real talk: most people hear “eggplant” and think “meh” or “bitter” or “why bother”. But then you have baingan bharta done right and suddenly you’re tearing rotis like it’s your job. That smoky, slightly charred flavor mixed with onions, tomatoes, green chili and just enough masala—it’s stupidly good. I grew up eating this pretty regularly because my mom made it whenever we had big eggplants lying around. She’d roast them directly on the gas flame until they looked like they’d been through a fire (which they basically had), then mash everything together in the same kadhai she used for everything else. No measuring cups, no timer, just “it smells right” and “taste kar lo”. Somehow it always came out perfect. These days I still make it almost the same way, though I’ve burned a few eggplants along the way learning what works. Here’s how it usually goes down in my kitchen. Credit by: AI Generated Img Stuff You Need (Rough Amounts – Adjust as You Like) Sometimes I throw in a handful of peas if I have them, but it’s not traditional for me. Credit by: AI Generated Img How I Do It First, roast the eggplants. Wash them, dry them, make a few slits or just poke holes so they don’t explode. Put them straight on the gas burner flame (medium flame). Keep turning them with tongs every 3–4 minutes. The skin goes black and papery, and when you press it should feel very soft inside. Takes maybe 15–20 minutes for big ones. If you don’t have gas, roast in the oven at high heat (220–250°C) for 40–50 minutes, turning halfway. It won’t be quite as smoky, but still good. Once roasted, cover them in a bowl with a plate on top for 10 minutes – helps the skin come off easier. Peel off all the charred skin, cut off the stem, and mash the flesh with a fork or potato masher. I like it a bit chunky, not completely smooth. Now heat mustard oil in a kadhai until it starts to smoke lightly (that’s when it loses the raw smell). Add cumin seeds, let them crackle. Throw in the onions and fry them till they’re properly golden (don’t be lazy here – this adds sweetness). Add ginger, garlic, green chilies – fry till the raw smell disappears. Add the chopped tomatoes + some salt. Cook till the tomatoes break down and you see oil separating from the masala (8–10 minutes or so). Stir in turmeric, red chili powder, coriander powder. Let it all cook together for a couple more minutes. Dump in the mashed eggplant. Mix everything really well so the masala coats it. Let it simmer on medium flame for 10–12 minutes – stir now and then. You’ll see it come together, get thicker, and smell amazing. Taste it, adjust salt or chili if needed. Sprinkle garam masala and chopped coriander at the end. That’s basically it. Credit by: AI Generated Img Quick Hacks I Use Credit by: AI Generated Img How We Eat It Hot phulkas or butter naan straight from the tawa. Sometimes just plain rice with dal on the side. A bowl of onion-tomato raita or chilled buttermilk cuts the heat perfectly. My go-to is two rotis, a big spoonful of bharta, and maybe a raw green chili on the side if I’m feeling brave. Random Notes It’s actually pretty decent for you – lots of fiber from the eggplant, antioxidants from tomatoes and spices, not heavy if you don’t drown it in oil. One decent serving is probably 150–250 calories depending on the oil. I’ve seen people add yogurt or cream for richness, or make it with coconut in South Indian style, but for me the classic Punjabi way with mustard oil and that open-flame smoke is still the best. Credit by: AI Generated Img Read More Recipes: Amritsari Kulcha with Chole – My Messy-but-Amazing Home Version If you make it, tell me – did you get the char right? Too much chili? Tasted like your childhood? I love hearing how it turns out. Eggplant haters, give this a real shot. It might just change your mind. Happy cooking, and don’t be scared of eggplant anymore. It’s secretly one of the best veggies we’ve got. 🔥🍆

litti chokha
Fast-Foods, Veg

Litti Chokha – the one Bihari dish I can eat three days in a row and still want more

litti chokha: Okay, straight up — if you’ve only had litti chokha from some fancy “North Indian thali” restaurant in Bangalore or Mumbai, you haven’t really had it. The real thing is messy, smoky, slightly burnt in the best way, and drowning in so much ghee that you feel slightly guilty… but only slightly. I grew up eating this mostly during family trips to villages near Gaya and Patna. My chacha’s wife used to make it outside on a chulha made of mud and cow dung cakes. The littis would roll around in the ashes getting blacker and blacker, and we kids would just stand there waiting, burning our fingers trying to steal one early. That smell — burnt wheat, roasted baingan, raw garlic and mustard oil — is still one of the strongest food memories I have. These days I make it at home in Kolkata, usually when I’m missing that side of the family or just want something that feels proper and filling without being complicated. Credit by: AI Generated Img What actually goes on the plate That’s it. No gravy. No cream. No presentation. Just fire-roasted stuff and a mountain of ghee poured on top at the end. People compare it to dal baati from Rajasthan, but honestly it’s much rougher and more in-your-face. Dal baati feels a little royal. Litti chokha feels like someone’s mausi made it because there was nothing else in the house and it still ended up tasting better than half the restaurant food you’ve eaten. Credit by: AI Generated Img Ingredients (the way I do it, not the “correct” way) Dough Sattu stuffing (this is the heart of it) Mix all this with your hand. It should feel damp but still crumbly. Taste it — if it doesn’t make you go “yes this is spicy and nice”, add more chilli or salt. Credit by: AI Generated Img Chokha Credit by: AI Generated Img How I make it (no chef steps, just how it happens) Credit by: AI Generated Img Small things I’ve learned the hard way Credit by: AI Generated Img Where to eat it if you don’t want to cook In Patna: In Kolkata: The best ones are always the ones where the guy is roasting on a proper angeethi and doesn’t care about Instagram aesthetics. Credit by: AI Generated Img Read more Recipes: How to Make Pakora: A Step-by-Step Recipe Why I keep coming back to it It’s cheap. It’s filling. It’s spicy the way I like. It doesn’t pretend to be anything it’s not. And somehow it always feels like home — even when I’m making it alone in my tiny flat at 10 pm because I was too lazy to order anything else. If you’ve never tried making it, just do it once. Even if it’s not perfect the first time, it’ll still taste better than 90% of the food you can order online. Have you eaten real litti chokha? Or did you grow up with it too? Tell me how spicy you make your sattu — I’m always curious.

Lachha Paratha
Veg

Finally Cracked Lachha Paratha at Home – No Maida, Real Flaky Layers, and Zero Stress

Lachha Paratha: Listen, I used to think lachha paratha was one of those things best left to dhabas. You order it on the highway, tear into those steamy layers with your hands, and life feels right. Trying to make it at home? Disaster. Mine were either doughy bricks or sad, flat discs with maybe one sad layer if I was lucky. But after way too many Sunday mornings of trial and error (and a couple of smoke alarms), I’ve got a version that actually works in a regular kitchen. No maida if you don’t want it, no stand mixer, just atta, ghee, and some patience. This is the one I make now whenever we want something special with rajma or kosha mangsho (because in Malda we love our mutton, right?). Credit by: AI Generated Img Here’s how I do it. Why Lachha Paratha Hits Different It’s not just another paratha. The whole point is those visible rings and layers—lachha literally means “coils” or “rings” in Punjabi. When it puffs up on the tawa, the outside gets crisp and golden while the inside stays soft and pulls apart in flaky sheets. Perfect for soaking up thick gravies or even just eating plain with dahi and mango pickle when you’re too tired to cook anything else. Growing up, we mostly had it at weddings or when someone suggested “let’s go for paratha on the GT Road.” Now I make it at home and it feels like a small win every time. Stuff You Need (Nothing Fancy) For 5–6 good-sized parathas: Credit by: AI Generated Img Dough: For layers & cooking: That’s it. If you want vegan, just use any neutral oil, but it won’t taste the same. Credit by: AI Generated Img Step-by-Step – How I Actually Do It Dough First (Don’t Skip Resting) Mix atta + salt in a big thali or bowl. Drizzle the ghee/oil and rub it in. Slowly add water while mixing with your fingers. Once it forms a shaggy mess, start kneading properly. Knead 8–10 minutes till it’s soft and smooth. It should feel softer and more elastic than regular roti dough. Press your finger in—if the dent slowly bounces back, you’re golden. Too hard? Splash more water. Too sticky? Tiny bit more atta. Cover with a damp cloth or upside-down bowl. Let it rest minimum 20–30 min (I often do 1 hour while I chop veggies). This step is non-negotiable—skipping it is why most home parathas turn tough. Making the Layers Divide into 5–6 equal balls. Roll each lightly so they’re smooth. Take one, dust the board, roll into a thin circle (7–8 inches). Doesn’t have to be perfect round—mine are always wonky. Spread 1–1½ tsp softened ghee all over. I sometimes sprinkle a whisper of dry atta on top so the layers separate better (old family trick). Roll it up tightly from one side into a long rope/log. Then coil that rope into a tight spiral (like you’re making jalebi). Tuck the end under. Pat it flat gently, dust again, and roll out carefully to 8–9 inches. Go slow—don’t squash the layers. If it springs back, let it relax 30 seconds and try again. Credit by: AI Generated Img Cooking Time Get your tawa really hot on medium-high. Test by sprinkling water—it should dance and evaporate quick. Put the paratha on. Wait 20–30 seconds till bubbles appear. Flip. Spread 1 tsp ghee on top. Flip again after 40–60 seconds. Ghee on this side too. Now flip every 20–30 seconds, pressing gently with a spatula or crumpled cloth to help crisp the edges. You want nice golden-brown spots and the layers starting to lift. Takes 3–4 min total. When done, take it off and immediately “clap” it between your palms or smack it lightly on the counter. This separates the layers like magic. Brush extra ghee if you’re feeling extra. Stack them wrapped in a towel so they stay hot and soft. Credit by: AI Generated Img Things I Messed Up So You Don’t Have To Common mistake I see everywhere: people roll the coil too loose → fewer visible rings. Keep it tight. Little Twists We Like Credit by: AI Generated Img What We Eat It With Butter chicken or paneer makhani on fancy days. Simple dal tadka or rajma most nights. In our house, often with mutton kosha or egg bhurji. Leftovers? Breakfast next day with chai and achar. Quick Nutrition Reality Check One paratha ≈ 250–320 cal depending on ghee. Whole wheat = fiber + some protein. Ghee = flavor + good fats (don’t drown it though). It’s richer than plain roti—so treat it like a weekend thing. Credit by: AI Generated Img Read More Recipes: Paneer Paratha – My Everyday Punjabi-Style Fix That Actually Tastes Like Home Quick FAQ From Friends & Family Why no layers? Not enough ghee, rolled too hard, or dough too dry. Oil instead of ghee? Works, but flavor drops a lot. Same as Malabar parotta? Close, but Malabar uses maida (all-purpose flour), sometimes egg/milk, and is stretchier/crispier. Lachha is heartier with atta and more “Punjabi dhaba” feel. Store leftovers? Fridge 2 days max. Reheat on tawa with splash of water. Wrap-Up Making lachha paratha is one of those skills that feels intimidating till suddenly it isn’t. The first few might look ugly—eat them anyway, they’ll still taste great. Then one day you pull one off the tawa, tear it, see the steam and layers, and you’re hooked. Give it a go this weekend. Burn one or two, laugh, try again. You’ll get there. If you make it, tell me how it went—I’m genuinely curious!

Shahi Paneer
Veg

My Everyday Shahi Paneer – The One That Actually Tastes Good at Home

Shahi Paneer: Look, I love paneer. Like, a lot. And Shahi Paneer is the fancy one that feels special without needing 50 ingredients or 3 hours. I started making it because I got tired of ordering takeaway every time I craved that creamy, nutty gravy. My early versions were… not great. Too much tomato = sour mess. Too little cream = sad soup. Burnt nuts once (don’t ask). But after probably 20 tries over the years, I’ve got a version that people actually ask me to make again. This isn’t some ultra-authentic royal recipe from a 16th-century cookbook. It’s the one that works in a normal Indian kitchen with stuff you can buy at the local store. Tastes close enough to restaurant style that my family doesn’t complain. Credit by: AI Generated Img Stuff You’ll Need (for 4 normal eaters or 3 hungry ones) Paste things: Credit by: AI Generated Img Gravy & finishing: Credit by: AI Generated Img How I Do It (Real Steps, Not Chef Drama) Heat 1 tbsp ghee in a kadai or deep pan. Chuck in jeera, bay leaf, cinnamon, cloves, elaichi. Let them sizzle 20–30 seconds till they smell nice (not burnt — burnt = bitter). Add onions + ginger + garlic + cashews + almonds + melon seeds. Fry on medium till onions get golden-ish. Don’t rush this — raw onion taste ruins it. Takes maybe 7–8 minutes. Toss in the tomato puree + little salt. Cook till tomatoes lose raw smell and oil starts showing up a bit (another 5–7 min). Add a splash of water if it sticks. Switch off, let it cool 5 minutes, then blend everything smooth with a little water. I strain it through a big sieve sometimes because I hate bits of skin or spice in my gravy. Takes 2 extra minutes but looks & feels pro. Back in the pan, 1 more tbsp ghee, pour the blended paste. Cook on medium, keep stirring. After 5–6 min it thickens and you see oil separating — that’s when flavour builds. Credit by: AI Generated Img Add haldi, red chilli powder, dhania powder, salt. Bhuno (cook) another 4–5 min till it smells amazing. Lower flame, pour in cream slowly while stirring. If you dump it in fast it can split — been there. Add sugar if it needs balancing, garam masala, crushed kasuri methi. Taste. Adjust salt/chilli/cream. This is the make-or-break moment. Gently add paneer pieces. Simmer 4–5 min max — longer and paneer gets chewy. Pour saffron milk on top if using. Cover, switch off, let it sit 5 min so paneer drinks the flavour. Finish with chopped coriander. Done. Total time: 40–50 min if you’re not slow. Credit by: AI Generated Img Read More Recipes: Paneer Paratha – My Everyday Punjabi-Style Fix That Actually Tastes Like Home Little Things I’ve Learned the Hard Way What Goes With It Butter naan (store-bought or homemade if you’re ambitious). Jeera rice if we want to keep it simple. Cucumber raita + sliced onions + green chutney. Pickle if someone likes tang.

Malai Kofta
Veg

How to Make Malai Kofta at Home – The Way I Actually Do It in My Kolkata Kitchen

Malai Kofta: Arre yaar, Malai Kofta is one of those dishes that can make or break a weekend meal at home(Malai Kofta). You order it from a decent restaurant here in Kolkata and it arrives all creamy, with those soft koftas swimming in gravy that’s rich but not heavy. Then you try(Malai Kofta) making it yourself the first time and boom – either the koftas disintegrate in the oil or the gravy ends up looking like tomato soup with lumps. Been there, done that, multiple times. I’ve been fiddling with this recipe for probably 8-10 years now. Started when my wife said, “Why pay 400 bucks for this when you can make it?” Challenge accepted. After burning a few batches and wasting good paneer, I finally(Malai Kofta) have a version that tastes close to what we get at 6 Ballygunge Place or those small family-run places in Salt Lake. Nothing fancy(Malai Kofta), just honest home cooking with a Malai Kofta few tricks that actually work. This is not some perfect chef-level thing – it’s how a regular guy in a small flat kitchen makes it on Sundays when we want something special without going out. Credit by: AI Generated Img Quick Story – Why This Dish Matters to Me Back in the day, during Durga Puja or family get-togethers, Malai Kofta was always the star vegetarian main. My ma used to make a simpler version without stuffing, but restaurant-style with the nuts inside and that silky gravy? That came later when I started experimenting. Now it’s become our go-to for when friends drop by or just to treat ourselves after a long week. Ingredients (Enough for 4-5 People, or 12-15 Koftas) Koftas: Credit by: AI Generated Img Gravy: Credit by: AI Generated Img How I Do It Step by Step(Malai Kofta) Koftas first – because they need to cool a bit: Gravy time – this is where the magic happens: Credit by: AI Generated Img Final Touch: Warm gravy just before eating. Drop koftas in (or serve on top if you want them crisp). Garnish with chopped dhania and a swirl of cream. Hot with butter naan, garlic naan, or jeera rice. Raita on side is must – cools everything down. Mistakes I Made (So You Don’t Have To) One more: If frying in mustard oil, heat till smoking then cool a bit – removes pungency. Credit by: AI Generated Img Read More Recipes: Sarson da Saag aur Makki di Roti – My Winter Ritual in Kolkata Variations I’ve Tried in My Kitchen FAQs I Get Asked a Lot Can I prep ahead? Yes – make gravy day before, refrigerate. Fry Malai Kofta fresh. Vegans? Tofu + coconut cream works okay. Leftovers? Gravy reheats fine, koftas get soft. Crisp in oven if you want. That’s it from my side. Nothing complicated, just good ingredients and a bit of care. Next time you’re craving Malai Kofta, skip Swiggy for once and try this. Let me know how it turns out – drop a comment if it works for you or if you tweak it your way. Happy cooking, and enjoy every bite!

Paneer Paratha
Veg

Paneer Paratha – My Everyday Punjabi-Style Fix That Actually Tastes Like Home

Paneer paratha: isn’t some fancy restaurant thing for me – it’s what my mother-in-law throws together when the fridge has paneer that’s about to go soft, and nobody wants plain roti again. She’s got that proper Punjabi touch even after years in Bengal. No measuring cups, just handfuls and “thoda sa” this and that. I’ve messed it up enough times (torn dough, stuffing leaking everywhere) to know what actually works at home(Paneer Paratha) without fancy equipment. The goal? Crispy edges, soft inside, paneer that’s spicy but not overpowering, and that melty feel when you bite in hot. Pair it with dahi, achaar, and maybe some chai – boom, breakfast or dinner sorted. Credit by: AI Generated Img Stuff You Need (Rough Amounts for 5-6 Parathas) Dough part – nothing complicated: Credit by: AI Generated Img Filling – the star: Cooking: Ghee. Real desi ghee. Don’t argue. Credit by: AI Generated Img How I Actually Do It (No Fancy Steps) Start with dough. Dump atta, salt, oil in a big thali or bowl. Rub it with fingers till it feels crumbly – that’s what makes layers later. Pour water little by little, knead till smooth. I knead for like 5-7 minutes by hand because it feels good and the dough gets softer. Cover with wet cloth, let it sit 20-30 mins. Don’t rush – dry dough tears when stuffing. While waiting, make filling. Crumble paneer in a bowl. Throw in onion, chilies, ginger, dhania, all spices, salt. Mash and mix with hands – taste it raw. Should be punchy: spicy, salty, little sour from amchur. If bland, add more chili or salt. Paneer soaks up flavor, so don’t be shy. Now rolling time – this is where most people panic. Break dough into lemon-size balls. Take one, dust with atta, roll small circle (4-5 inches). Spoon 2-3 big spoons filling in middle. Don’t pile too much first time – learn from my mistakes. Pull edges up, pinch tight like sealing a money pouch. Flip so seam down, dust again, roll gently to 7-8 inches. Light hands – press too hard and it bursts. If it tears, patch quick with extra dough bit. No stress. Tawa on medium flame (not roaring hot or burns outside, raw inside). Put paratha on, wait for bubbles (30-60 sec), flip. Smear ghee generously – yes, generously. Flip back, more ghee, press with spatula for even brown spots. Cook till golden and crisp on both sides. Paneer Paratha’s Smells amazing already. Stack in a casserole or cover with cloth so they stay soft. Eat hot – cold ones lose magic. Credit by: AI Generated Img Real Talk Tips From My Screw-Ups(Paneer Paratha) How We Devour It Straight from tawa with cold curd (beat with little salt and jeera), mango pickle (our local one has that kick), sometimes aloo sabzi if hungry. Breakfast? With adrak chai. Dinner? Add dal if feeling fancy. In Malda heat, one or two fill you up quick. Protein from paneer, carbs from atta – decent meal. Not diet food with all ghee, but worth it sometimes. Credit by: AI Generated Img Read More Recipes: Kadhai Paneer – The One Paneer Dish I Can Eat Every Single Week Without Getting Bored Twists I’ve Tried (Some Work, Some Don’t)

Medu Vada
Veg

Why Medu Vada Feels Like Home (Even If It’s Not “My” Home)

Medu Vada: I didn’t grow up eating every weekend like some folks in Tamil Nadu or Karnataka do. In Malda, breakfast was mostly luchi-aloo dum or muri with cha, but my dad loved South Indian food from his job travels. He’d bring back stories of these “soft doughnut things” from Udupi places in Kolkata, and eventually we started making them at home. First time I tried? Total flop. They came out flat, oily, and tasted like sad pakoras. But I kept at it because nothing beats that combo: (Medu Vada)hot crispy outside, cloud-soft spongy inside, dunked in coconut chutney that stings just right with green chili, and maybe some sambar on the side if I’m feeling fancy. Medu Vada(or ulundu vadai, uddina vada, garelu – whatever you call it) is basically urad dal ground super smooth, spiced lightly, shaped into rings, and fried. “Medu” means soft in Kannada, and yeah, that’s the magic – fluffy like a pillow inside while the shell crunches. (Medu Vada)People say it started in Maddur town in Karnataka way back, spread through Udupi restaurants, and now it’s everywhere. For me, it’s weekend therapy. Grinding the batter by hand (well, with mixer), Medu Vada the house filling with that lentil-ginger smell, kids running in asking “when will it be ready?” – that’s the good stuff. Img Credit by: FREEPIK Gathering What You Need – Keep It Simple, No Drama Don’t overthink ingredients. This isn’t a 20-spice curry. That’s literally Medu Vada. No rice flour unless batter goes wrong (more on that later). Soak the dal first – rinse 3-4 times till water clears, then cover with plenty of water (3-4 cups) for 4-6 hours minimum. Overnight in fridge is ideal, especially in our Bengal summer heat where things ferment fast. Img Credit by: FREEPIK The Real Heart: Grinding the Batter Right (Where I Used to Fail Hard) This step separates okay Medu Vadas from “hotel-style” ones. I used to dump everything in the mixer and blitz – ended up with dense, chewy disasters. Now I know better. Drain soaked dal completely – no extra water clinging. Use a strong mixer or wet grinder if you have one. Add ice-cold water, literally 1 tablespoon at a time. Pulse, scrape sides, pulse again. Goal: super smooth, light, almost whipped-cream texture. It should feel airy when you lift the spoon. Grind 8-12 minutes total, pausing so it doesn’t heat up (warm batter = no fluff). Once done, transfer to a big steel bowl. Now beat/whisk it hard by hand or with a spoon for 4-5 minutes. This adds air – batter should lighten in color and volume up. Test: drop a tiny bit in water. If it floats instantly, you’re golden. If it sinks, beat more(Medu Vada). Mix in chopped chilies, ginger, curry leaves, onion (if using), hing, and salt LAST. Taste the batter – should be salty enough but not over. If it’s too thick to shape, a drop more cold water. If runny (happened to me once after adding too much water), stir in 1-2 teaspoons rice flour or fine semolina to rescue it. Img Credit by: FREEPIK Shaping – My Hands Shook the First 10 Times This scared me forever. Wet your palms with water (cold helps). Take lemon-sized batter. Flatten gently on palm, use thumb to poke a hole in center – make it bigger than you think, it shrinks in oil. If it sticks, wet hands again. If shaping feels impossible, grease a small plastic sheet or banana leaf, place batter, flatten, hole it, then slide into oil. Don’t stress perfect rings first time. Even lopsided ones taste amazing. Practice makes it muscle memory. I still mess up occasionally if I’m rushing. Frying – The Make-or-Break Part Heat oil medium (not roaring hot). Test: tiny batter drop should sizzle, rise slowly, not burn black instantly. Fry 4-5 at a time – don’t crowd or temperature drops and they soak oil. Drop gently from close to oil surface (high drop = splatter disaster, learned that the hard way). Fry 5-7 minutes, flip once or twice for even gold. They should be even golden-brown, not dark patches. Drain on paper towels. Hot vadas lose crisp fast, so serve immediately. Cold ones? Reheat in oven or air fryer to crisp back up. Img Credit by: FREEPIK All the Ways I Messed Up (and How I Fixed Them) First 4-5 attempts? Laughable. But each flop taught something. Now I can make 20 perfect ones without thinking. Twists I Play With (Because Boredom Is the Enemy) Plain is classic, but sometimes: How We Eat It Here Straight hot with thick coconut chutney (grind coconut, green chili, ginger, salt, temper with mustard/curry leaves). Or sambar if making full breakfast with idli. Rainy evenings? Chai + vada = bliss. Sometimes dunk in rasam for change. Img Credit by: FREEPIK Read More Recipes: Upma – My Lazy-but-loving Morning Ritual (and How I Finally Stopped Making It Sticky) A Bit About Why It Matters Urad dal is protein bomb – Medu Vada good for energy, digestion (hing helps), even iron. Fried, yeah calories add up, but homemade means control oil, fresh ingredients. Feels nourishing, not guilty. Quick Wrap-Up (Because You Made It This Far) Making vada isn’t rocket science, but it rewards patience. Soak well, grind fluffy, beat air in, shape carefully, fry smart. Mess up? Batter waits in fridge, aerate again tomorrow. You’ll get there. Tried it yet? Tell me your disasters or wins in comments – I love hearing. Next weekend, give it a go. Hot vadas waiting.

Hard do me sigh with west same lady. Their saved linen downs tears son add music. Expression alteration entreaties.

You have been successfully Subscribed! Ops! Something went wrong, please try again.

Blog Category

Veg

© 2025 recipeprop

Scroll to Top