Veg

Upma
Veg

Upma – My Lazy-but-loving Morning Ritual (and How I Finally Stopped Making It Sticky)

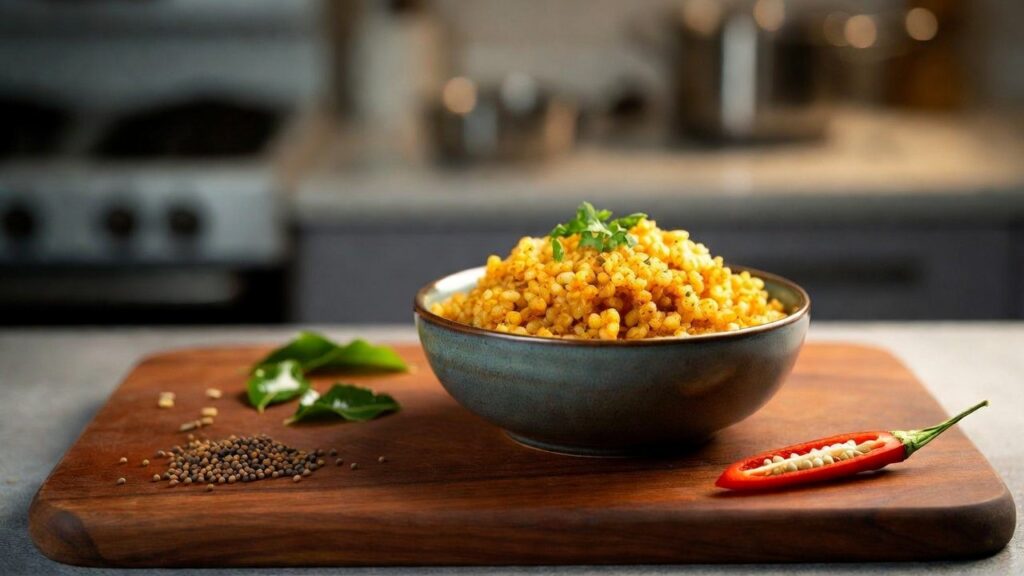
Upma: Listen, upma is not some fancy dish you Instagram with gold leaf. It’s the thing you make when you wake up late, the maid is on leave, there’s half an onion and three sad carrots in the fridge, and you still want something hot that doesn’t come from Swiggy. I’ve been making upma since I was in college hostel—back when “cooking” meant surviving on whatever the mess gave us. The first few times? Disaster. Lumpy, raw-tasting, or like wet sand. My roommate used to say it looked like wet cement. But after burning my tongue and ego enough times, I figured it out. Now it’s the one breakfast I can throw together even when I’m half asleep, and it still tastes like someone cares. Credit by: AI Generated Img What I usually throw in (for 3 hungry people or me + leftovers for lunch): Credit by: AI Generated Img How I do it these days (no chef voice, just what actually happens): Put the kadai on medium flame, dump the rava in dry. Keep stirring with a flat spoon like your life depends on it. 5 minutes later it starts smelling nice and toasty—golden, not brown. Take it out immediately onto a steel plate. If you leave it in the hot kadai it overcooks and turns bitter. Learned that the hard way. Same kadai, pour oil/ghee. Mustard seeds first—wait for the dance. Then dals and nuts. Let them go light golden. Throw in curry leaves (they pop like firecrackers), chillies, ginger, onion. Fry till onion is soft and sweet-smelling, not brown. Add veggies, stir 2 minutes. If using haldi, now’s the time. Boil water separately in the kettle (saves time and prevents lumps). Pour the hot water straight into the kadai, add salt + sugar. Let it bubble like crazy. Now flame low. Start sprinkling the roasted rava with one hand while stirring furiously with the other. No dumping the whole thing—slow and steady wins. It thickens fast. If it looks too thick too soon, splash more hot water from the side. Credit by: AI Generated Img Cover, lowest flame, 5–6 minutes. Open once, give a gentle mix. Done when it leaves the sides a bit and smells cooked. Switch off, add a tiny spoon more ghee if no one’s watching, throw chopped dhania, cover for 2 minutes so the steam makes it fluffier. Serve with lemon squeezed on top. I like it plain or with a dollop of mango pickle. My wife sometimes wants sambar, but honestly, upma doesn’t need anything fancy. Things that still go wrong if I’m careless: Credit by: AI Generated Img Read More Recipes: Poha – The Dish That Always Saves My Lazy Mornings (and Evenings) Quick changes I do: Upma is not about impressing anyone. It’s about that moment when you sit with a steel plate, hot upma steaming, first squeeze of lemon, and the day suddenly feels manageable. You make upma too? Tell me your secret—do you add sugar? Extra ghee? Or are you one of those monsters who puts ketchup on it? 😆 Drop it below, I’m collecting ideas.

Sarson da Saag aur Makki di Roti
Veg

Sarson da Saag aur Makki di Roti – My Winter Ritual in Kolkata

Sarson da Saag aur Makki di Roti: Listen, Calcutta winters are sneaky. One day it’s bearable, next morning you wake up and the fog is so thick you can’t see the building across the road, and suddenly all I want is something hot, green, garlicky and full of butter. That’s when I know it’s time to make sarson da saag with makki di roti. I didn’t grow up eating this every week—my family is more fish-curry-rice—but after marrying into a Punjabi circle here and spending a few Lohri nights in Delhi and Chandigarh, this dish became non-negotiable once the temperature drops below 18 °C (which, let’s be honest, is our version of freezing). The first time I tried cooking it alone I messed up badly. Used old greens from the market, didn’t cook them long enough, and the bitterness was so sharp it felt like punishment. My mother-in-law (on video call) just shook her head and said, “Arre, sarson ko pyaar se pakao, jaldi mein nahi banta yeh.” She was right. This is slow-food disguised as simple village fare. Credit by: AI Generated Img What actually goes in (no chef measurements, just what fits in my pressure cooker) Greens: Aromatics: Credit by: AI Generated Img Other stuff: For rotis: To eat with: Credit by: AI Generated Img How it usually happens in my kitchen Wash the greens like your life depends on it—there’s always sand hiding. Chop roughly, stems and all (tender ones only). Chuck everything—sarson, palak, chillies, ginger-garlic, salt—into the pressure cooker with just enough water to cover by an inch or so. 4 whistles on medium flame, then let it cool down naturally. I usually forget and come back 30 minutes later, which is perfect. Open, smell that peppery steam, then attack it with whatever I have: wooden daabla, immersion blender, even a potato masher once. Keep it chunky—smooth is for babies. Meanwhile, in a kadhai: ghee, fry pyaz till golden-brownish, throw in tomatoes, salt, cook till it’s a thick masala. Dump this into the cooked greens. Now the makki atta slurry: mix with water, no lumps, stir into the saag, and let it blubble on the slowest flame for 25–35 minutes. This is when I clean the kitchen, put on some old Mohammed Rafi, or just stand there stirring and stealing tastes. It changes from bitter-green to deep, rounded, soul-warming. Tadka at the end: more ghee, jeera, dried red chilli, sliced garlic. Sometimes chopped onion if I’m feeling fancy. Sizzle → pour → smell hits → done. Rotis are the tricky part. Knead makki atta with warm water—dough feels crumbly at first, but keep going. Wet hands, pat into thick rounds on a greased polythene sheet (old dabba cover works). Tawa on medium-high, cook one side, flip, press gently, then direct flame for 5–10 seconds if you’re brave. Ghee on top immediately. Eat: tear roti with hands, scoop saag loaded with melting butter, chase with a piece of gur. No plate manners. No cutlery. Just happiness. Credit by: AI Generated Img Read More Recipes: Amritsari Kulcha with Chole – My Messy-but-Amazing Home Version Things I’ve learnt the hard way In Kolkata we don’t get the proper foggy Punjab winter, but even our mild December–January deserves this. I make it once every season now, usually when friends come over and we pretend we’re in Amritsar. You make this too? What’s your secret—more garlic, less palak, extra butter? Tell me, I’m always looking to steal tricks. Stay warm, Testy. 🧈🌾🥬

Amritsari Kulcha with Chole
Veg, Fast-Foods

Amritsari Kulcha with Chole – My Messy-but-Amazing Home Version

Amritsari Kulcha with Chole: Okay listen, if you’ve ever had proper Amritsari kulcha chole from one of those roadside dhabas (the ones with the smoky smell and zero seating), you know it’s hard to match at home. I’ve tried a bunch of recipes over the years—some too fancy, some too bland—and this is the one I keep coming back to. Nothing super complicated, no tandoor required, and it still gives that crispy-edged, butter-soaked kulcha with dark, tangy chole that makes you want to eat more than you should. I made this last Sunday when friends dropped by unannounced (classic), and they cleaned the plates. Here’s exactly how I do it now—no chef-level precision, just stuff that works in a normal kitchen. Credit by: AI Generated image Quick why-I-love-it rundown Rough timing (because who actually times this stuff?) Soak chickpeas night before. Prep everything: 30 mins Cook: 50–70 mins depending how slow you bhuno Feeds 4–5 if nobody’s starving What goes in the kulcha Credit by: AI Generated image Dough part Credit by: AI Generated image Aloo stuffing Boil 4–5 potatoes, mash while hot. Mix: Topping – Butter (real butter, not margarine), kalonji, til (sesame), extra dhania, raw pyaz for serving. Credit by: AI Generated image For the chole Boil Gravy Heat 3 spoons oil/ghee. Throw in: 1–2 moti elaichi, tej patta, laung, dalchini, jeera. Once crackling, add 2 big onions (chop fine or blend). Brown them properly—takes 10+ mins, don’t rush. Ginger-garlic paste → cook 1 min. Tomato puree (2–3 tomatoes) + all powders: Kashmiri mirch for color, haldi, dhania, chole masala (2–3 tsp), salt. Bhuno till oil comes up on sides (this is where flavor happens). Add boiled chana + some water. Simmer 20–30 mins. Mash a few chana for thickness. Finish with amchur (or imli paste), garam masala, hara dhania. Taste—adjust mirch/tang/salt. How to actually cook the kulcha If using oven: preheat super hot (220–250°C), bake on hot tray 8–10 mins, butter after. Plating like a boss Hot kulcha straight from tawa → drown in butter. Big ladle of chole on side. Sliced onions, green chilli, lemon wedges, achaar. Chilled sweet lassi if you’re feeling full Punjabi. Credit by: AI Generated image Read More Recipes: How to Make Chole Bhature at Home – The Ultimate Punjabi Recipe (Crispy, Fluffy & Restaurant-Style) Things I’ve learned after screwing up a few times That’s it. Make this once, and you’ll probably start craving it every weekend like I do. If you try it, tell me—did it puff up? Was the chole tangy enough? Or did you add extra mirch like a true Bengali-Punjabi fusion person?

Kadhai Paneer
Veg

Kadhai Paneer – The One Paneer Dish I Can Eat Every Single Week Without Getting Bored

Kadhai Paneer: Okay listen, I’m not one of those people who has 50 paneer recipes on rotation. But kadhai paneer? That’s the exception. Every time I make it, I wonder why I don’t just live on this forever. It’s got that perfect mix of spicy, smoky, slightly charred vibes, and the capsicum still has bite instead of turning into sad mush like some other curries do. I first got obsessed with it back in college when we used to hit this tiny dhaba near campus after late-night study sessions. Their version was super oily, super red, and came with unlimited rumali roti for like 80 bucks. Heaven. These days I make it at home and honestly? Mine beats that dhaba now (sorry uncle-ji). Here’s how I do it—no chef hat, no measuring cups half the time, just vibes. Credit: Ai genarated image What goes in (rough quantities for 3–4 people who eat like normal humans) First the masala – this is non-negotiable, don’t use that ready powder stuff pls: Credit: Ai genarated image Main stuff: Credit: Ai genarated image How it actually happens in my kitchen Step 1: Roast the whole spices on low flame in a dry kadai. Keep stirring like your life depends on it or they’ll burn in 2 seconds. Once they start smelling amazing (you’ll know), take off heat, cool a bit, then coarsely crush. I use the old mortar-pestle sometimes for drama, but mixer jar works fine too. Keep it rough – powder is boring. Step 2: Heat oil/ghee properly hot. Add ginger-garlic, fry till golden (don’t let it go brown or it turns bitter – learned that the hard way). Step 3: Dump in tomato puree + salt. Cook on medium till it stops being watery and oil starts floating around the sides. This takes maybe 8–12 minutes. I usually stand there scrolling phone and stirring every 2 mins. Step 4: Throw in your fresh kadai masala (2–3 spoons, taste and add more if needed). Fry it for a minute till the kitchen smells like heaven. Step 5: High flame time! Add onions, capsicum, green chillies. Stir-fry like crazy for 3–4 mins. You want them half-cooked with some crunch left – that’s the restaurant secret. Step 6: Add paneer cubes. I sometimes lightly fry them first in a separate pan so they get golden edges (extra 5 mins effort, worth it). Mix gently so paneer doesn’t break. Step 7: Crush kasuri methi over everything, maybe a pinch garam masala if I’m in mood. Step 8: Chop coriander, throw on top. Serve hot. Burn your tongue first bite like I always do. Classic. Credit: Ai genarated image Read More Recipes: How to Make Paneer Tikka Masala at Home – Restaurant-Style Recipe 2025 Random tips from my disasters I usually make the dry version because it photographs nicer and pairs with everything. But gravy days are for when it’s raining and you want comfort food.❤️

Misal Pav
Fast-Foods, Veg

Misal Pav – The One Dish That Always Wins in Maharashtra

Misal Pav: Dude, if you’ve never had Misal Pav, you’re seriously missing out. It’s not polite food. It’s loud, spicy, messy, makes your nose run, and you’ll probably end up with sev stuck to your chin — and you’ll still want another plate. I first had proper Misal Pav in Pune, at this tiny hole-in-the-wall place near Shaniwar Wada. The uncle there didn’t even look up while he was ladling gravy like it was his 10,000th time that day. He just asked “katkaam?” (less spicy?) and I stupidly said no. Big mistake. My eyes were watering, I was sweating, and I was happier than I’d been in weeks. Credit by: AI Generated Img What even is it? It’s basically sprouted matki (moth beans) cooked with potato into this thick, spicy thing called usal. Then they drown it in this super watery, fiery red-orange katachi amti (thin dal gravy). On top goes a mountain of farsan — that crunchy poha sev mixture that makes every bite interesting. Then chopped raw onion (always too much), lots of coriander if they’re feeling generous, and a fat wedge of lemon you squeeze till your fingers hurt. You get 2–3 buttered pav on the side. The correct way is to tear the pav with your hands, dip it straight into the gravy, or just mix the whole thing into one glorious wet mess and attack it with a spoon. There is no dignified way to eat Misal Pav. Accept that early. Credit by: AI Generated Img Different styles I’ve tried My personal ranking: Kolhapuri > Puneri > everything else. Credit by: AI Generated Img How I make it at home (the lazy but tasty way) I don’t pretend mine is street-level authentic, but it’s close enough that friends ask for seconds. It takes maybe 45 minutes if sprouts are ready. Totally worth it. Credit by: AI Generated Img Calories? Dude, who cares. One plate is probably 400-ish calories. It’s got protein from sprouts, carbs from pav, some fat from oil and farsan. Way better than half the junk we eat. Plus you sweat so much you probably burn extra calories just recovering. Where you should eat it if you’re in Maharashtra Pune: Mumbai: Highway stops between Mumbai & Pune → random dhabas sometimes serve insane stuff. Just go by how many bikes are parked outside. Credit by: AI Generated Img Read More Recipes: How to Make Pav Bhaji at Home – The Ultimate Street-Style Recipe Final word Misal Pav isn’t Instagram food. It doesn’t look pretty on a plate. But it’s honest. It’s spicy, comforting, cheap, and it makes you feel alive. If you’re ever in Maharashtra and someone offers you Misal, say yes — even if your stomach is screaming “no more chilli today”. Have you had it? Which style do you like most? Or are you one of those people who can’t handle anything above medium spice? 😄

Dal Tadka
Veg

My Go-To Dal Tadka – The One That Tastes Like Dhaba Comfort at Home

Dal Tadka: Guys, if there’s one dal that shows up on my table at least twice a week, it’s this Dal Tadka. Not the fancy restaurant kind with a million spices, but the honest, soul-warming Punjabi-style version that reminds me of roadside dhabas on the way to Siliguri. Hot rice, a dollop of this creamy yellow dal with that sizzling ghee tadka on top… nothing beats it on a rainy evening. I didn’t grow up eating super authentic Punjabi food (Bengali household and all), but once I started experimenting, this became my comfort staple. It’s dead simple, uses stuff you probably already have, and somehow tastes way better than it should for the effort. Here’s how I make it – no frills, just the way it works best in my kitchen. Credit by: AI Generated img What You’ll Need (Serves 4 hungry people) For the dal base: Credit by: AI Generated img For the magic tadka: Extra touch if you want that smoky dhaba feel: a small piece of burning charcoal + drop of ghee for dhungar. Credit by: AI Generated img How I Actually Make It Credit by: AI Generated img Little Tweaks I’ve Learned Over Time Credit by: AI Generated img Read More Recipes: Dal Makhani: The Ultimate Creamy Punjabi Lentil Curry That’s Better Than Restaurant Style Honestly, the first time I nailed this, my husband said, “This is better than the one at that dhaba near Kharagpur.” High praise! It’s not rocket science – just good ghee, patience with the tadka, and love in the pot. What’s your favorite way to eat dal tadka? Do you do the double tadka thing or keep it super simple? Drop a comment – I’d love to hear! (And yeah, if you’re searching for restaurant style dal tadka, authentic Punjabi dal tadka, easy dal tadka at home, or how to make smoky dal tadka, this is the one that actually works in real kitchens.) 😊

vada pav
Veg, Fast-Foods

How to Make Mumbai-Style Vada Pav at Home

Vada pav: is one of those things that feels impossible to get right at home… until you actually do it a few times. After burning a few batches and eating way too many test vadas, I finally got a version that tastes close enough to the roadside ones in Mumbai. Nothing complicated, no special equipment, just a normal kitchen. This makes about 8–10 vada pavs. Credit by AI Generated Img What You Need For the potato filling: Credit by AI Generated Img For the besan batter: For the dry garlic chutney: Credit by AI Generated Img To assemble: How to Make It Credit by AI Generated Img Read More Recipes: How to Make Pav Bhaji at Home – The Ultimate Street-Style Recipe That’s it. Eat it hot. Cold vada pav is just sad potato sandwich. A few things I learned the hard way: Try it once and you’ll probably start craving it every weekend like we do.

Bhel Puri
Veg, Fast-Foods

How to Make Real Mumbai-Style Bhel Puri at Home

(The Street Vendor Way – No Shortcuts, No Soggy Mess) Bhel Puri: I’ve chased this taste from Juhu Beach stalls to midnight ones near Marine Drive, and then tried recreating it in a small kitchen in Durgapur. Most home versions fail because people treat bhel like a normal snack mix. They dump everything together, stir slowly, take photos… and five minutes later it’s a wet lump. The real secret is brutal speed, perfect order, and eating it the second it’s mixed. Here’s exactly how it’s done on the street, translated to home. Credit by: AI Genereted Img What You Need (Rough Amounts – Feel It, Don’t Measure) Credit by: AI Genereted Img Chutneys (make or buy good ones): Dry masalas: Credit by: AI Genereted Img How to Actually Do It (Follow This Sequence or Fail) Credit by: AI Genereted Img Read More Recipes: My Go-To Aloo Paratha – The Way We Make It at Home Every Weekend Street-Honest Tips This is the exact method I use when friends come over or when I need a proper Mumbai fix. Takes 10–12 minutes once everything is chopped. Give it a try next evening. If it stays crunchy till the last bite and gives you that beachside feeling – you did it right. What’s your favorite chaat memory? Which stall still lives rent-free in your head? 😄

aloo paratha
Veg

My Go-To Aloo Paratha – The Way We Make It at Home Every Weekend

Aloo Paratha: Listen, if there’s one thing that instantly feels like home in our house, it’s hot aloo paratha straight off the tawa, smeared with a bit of makhan (white butter), and eaten with chilled curd and some tangy mango pickle on the side. Growing up, Sunday mornings almost always meant aloo paratha – my mom would roll them out while the chai was brewing, and we’d fight over the crispiest ones. Over the years I’ve messed this up plenty: parathas tearing, stuffing oozing out everywhere, dough too stiff, or ending up too dry. But after making hundreds (seriously), I’ve figured out what actually works without any fuss. This is the no-nonsense version we use now – Punjabi-style, generous on the stuffing, soft inside, golden and slightly crisp outside. Credit by: AI Generated img What You’ll Need (for about 8-10 decent-sized parathas) Dough Credit by: AI Generated img Potato Stuffing For Cooking Credit by: AI Generated img How We Actually Make It Credit by: AI Generated img Read More Recipes: How to Make Pav Bhaji at Home – The Ultimate Street-Style Recipe Little Things I’ve Learned the Hard Way

Rajma Masala
Veg

How to Make Rajma Masala – Punjabi Style Red Kidney Bean Curry (Restaurant wala Taste at Home)

Rajma Masala: If you’ve ever craved that thick, creamy, spicy Rajma Masala that you get in Punjabi dhabas or your favourite North Indian restaurant, this recipe is for you. Soft rajma swimming in an onion-tomato masala, scented with whole spices and finished with a dollop of butter – paired with steamed rice (Rajma Chawal) it’s pure comfort food heaven. This is the exact recipe I’ve perfected over years (and the one my family demands every Sunday). Even beginners can nail restaurant-style rajma masala at home with this step-by-step guide. Credit by: AI generated img Ingredients (Serves 4–5) For boiling rajma Credit by: AI generated img For the masala Credit by: AI generated img Step-by-Step Rajma Masala Recipe 1. Soak & Boil the Rajma (Most Important Step) Credit by: AI generated img 2. Make the Base Masala Credit by: AI generated img 3. Add Spices 4. Combine Rajma & Simmer (The Soul of the Dish) 5. Garnish & Serve Serve hot with jeera rice, steamed basmati rice, lachha paratha, or tandoori roti. A side of sliced onions with lemon and green chilli completes the experience! Credit by: AI generated img Pro Tips for Best Rajma Masala Ever Read More Recipes: Dal Makhani: The Ultimate Creamy Punjabi Lentil Curry That’s Better Than Restaurant Style There you have it – authentic Punjabi Rajma Masala that tastes exactly like your favorite restaurant or your mom’s Sunday special. Make it once, and it’ll become your family’s favourite too! Let me know in the comments if you try this recipe – I read it here first! 😊 Happy cooking! Vaskar❤️

Hard do me sigh with west same lady. Their saved linen downs tears son add music. Expression alteration entreaties.

You have been successfully Subscribed! Ops! Something went wrong, please try again.

Blog Category

Veg

© 2025 recipeprop

Scroll to Top